

Clear Cache on PS5 Speed up Performance Playstation 5
Is your PS5 running slower than usual? Are you experiencing glitches or freezing during gameplay? It might be time to clear the cache on your PS5. Clearing the cache can help improve system performance and resolve various issues you may be facing.
Clearing the cache on your PS5 is a simple and straightforward process. Follow these step-by-step instructions to clear the cache and get your console running smoothly again:
Step 1: Power off your PS5
To begin, make sure your PS5 is completely powered off. Press and hold the power button on the front of the console until you hear two beeps. This will indicate that the console is turning off.
Step 2: Disconnect the power cable
Once your PS5 is powered off, disconnect the power cable from the back of the console. This will ensure that the console is completely disconnected from any power source.
Step 3: Wait for a few minutes
After disconnecting the power cable, wait for at least five minutes. This will allow the cache to clear and any residual power to dissipate.
Step 4: Reconnect the power cable and power on your PS5
After the waiting period, reconnect the power cable to the back of the console. Once connected, press the power button to turn on your PS5. Allow the console to fully boot up.
Step 5: Clear the cache
Once your PS5 is powered on, navigate to the system settings menu. From there, select “Storage” and then “Clear Cache.” Confirm your selection and wait for the cache to be cleared. This process may take a few minutes.
Step 6: Restart your PS5
Once the cache is cleared, restart your PS5. This will ensure that the changes take effect and any lingering issues are resolved. Your console should now be running smoother and faster.
Clearing the cache on your PS5 is a simple yet effective way to improve performance and resolve issues. By following these step-by-step instructions, you can clear the cache on your PS5 and enjoy a smoother gaming experience. If you continue to experience issues, it may be worth reaching out to Sony support for further assistance.
Why Clear the Cache on PS5 Console?
Clearing the cache on your PS5 can help improve overall system performance and resolve various issues that you may encounter while using the console. The cache is a temporary storage location where data, including game updates, system updates, and user preferences, are stored for quick access.
Over time, the cache can become cluttered and filled with unnecessary files, which can slow down the system and cause glitches or freezing during gameplay. By clearing the cache, you can ensure that your PS5 is running efficiently and smoothly.
Benefits of Clearing the Cache
Clearing the cache on your PS5 offers several benefits, including:
- Improved System Performance: Clearing the cache frees up storage space and allows the system to run faster, ensuring a smoother gaming experience.
- Resolved System Glitches: Clearing the cache can help resolve system glitches and freezing issues that may arise due to corrupted or outdated data.
- Reduced Loading Times: By clearing the cache, you can reduce loading times for games and applications, allowing you to get into your favorite games quicker.
- Updated Game Data: Clearing the cache ensures that you have the most up-to-date game data, including patches and updates, which can improve game performance and compatibility.
When to Clear the Cache
It’s a good idea to periodically clear the cache on your PS5 to maintain optimal system performance. Additionally, you may want to consider clearing the cache if you experience any of the following issues:
- Slow system performance or lag during gameplay
- Game crashes or freezing
- Problems downloading or installing updates
- Issues with loading times or long load screens
By regularly clearing the cache on your PS5, you can keep your console running smoothly and ensure an uninterrupted gaming experience.
Step 1: Turn off the PS5 cache
Before clearing the cache on your PS5, make sure to turn off the console completely. Here’s how you can do it:
|
1. |
From the Home screen, navigate to the power options. |
|
2. |
Select the Power icon to open the power menu. |
|
3. |
Choose the Turn Off PS5 option from the power menu. |
|
4. |
Confirm your selection by pressing the X button. |
|
5. |
Wait for the PS5 to completely shut down before proceeding to the next step. |
By following these steps, you can ensure that the PS5 is turned off properly before clearing its cache.
Step 2: Unplug the Power Cord
Before proceeding with the cache-clearing process, make sure to unplug the power cord from your PS5 console. This step is essential to ensure the safety of your device and to avoid any potential damage.
To unplug the power cord, locate the cord at the back of the console and gently pull it out from the power outlet. It is important to handle the power cord with care to avoid any accidental injuries or damage.
Why is unplugging the power cord important?
Unplugging the power cord is necessary to completely power off your PS5 console. By disconnecting the power cord, you ensure that all the electrical components within the console are fully deactivated.
When should you unplug the power cord?
You should unplug the power cord after shutting down your PS5 console. Make sure to properly turn off the console before removing the power cord to avoid any potential data loss or damage to the system.
By following this step, you are ready to proceed to the next step, which involves letting the console sit for a few minutes to allow all the residual power to drain away. This will help in clearing the cache effectively.
Step 3: Wait for 30 Seconds
After clearing the cache on your PS5, it’s important to wait for 30 seconds before proceeding. This allows the system to fully reset and refresh, ensuring that the cache is completely cleared.
During this waiting period, you may see a blank screen or experience temporary lag. This is normal as the system resets and prepares to load the updated cache settings.
Why wait for 30 seconds?
Waiting for 30 seconds is essential as it gives the PS5 enough time to clear any temporary data and cache that may still be stored in the system’s memory. This waiting period allows for a thorough reset, ensuring that the cache is completely cleared and ready to be refreshed.
What happens during the waiting period?
During the 30-second waiting period, the PS5 is actively resetting and preparing to load the updated cache settings. This may involve shutting down certain background processes, clearing temporary files, and initializing the cache-clearing process. This waiting period is crucial to ensuring that the cache is properly cleared and that the system is ready for optimal performance.
Step 4: Plug in the Power Cord and Turn cache on a ps5
Once you have cleared the cache on your PS5, it’s time to plug in the power cord and turn on the console. Here’s the step-by-step guide:
1. Find the power cord: Locate the power cord that came with your PS5. It should be a thick cable with a power plug on one end and a connector for the console on the other end.
2. Connect the power cord to the console: Take the end of the power cord with the connector and plug it into the corresponding port on the back of your PS5. Make sure it fits securely and is firmly plugged in.
3. Connect the power cord to an electrical outlet: Take the other end of the power cord and plug it into a nearby electrical outlet. Make sure the outlet is functioning properly and can provide the necessary power for your console.
4. Turn on the PS5: Once the power cord is securely connected to both the console and the electrical outlet, press the power button on the front of the PS5. The power button is typically located on the bottom-right corner of the console. Hold the button down for a few seconds until you see the PS5 logo appear on your TV screen.
5. Follow the on-screen instructions: After turning on the PS5, you may need to follow some on-screen instructions to complete the initial setup process. This may include connecting to a Wi-Fi network, signing in to your PlayStation Network account, and adjusting various system settings.
By following these steps, you should be able to successfully plug in the power cord and turn on your PS5. Enjoy gaming!
Once you have accessed the home screen of your PS5, it’s time to navigate to the Settings menu in order to clear the cache. Follow the step-by-step instructions below to achieve this:
- Using your controller, press the “Home” button to access the home screen.
- Scroll horizontally to find the “Settings” icon, which looks like a gear.
- Select the “Settings” icon by pressing the “X” button on your controller.
- In the Settings menu, scroll down until you find the “Storage” option and select it.
- In the Storage menu, choose the “System Storage” option.
- Scroll down and select the “Clear Cache” option.
By following these steps, you will successfully navigate to the Settings menu on your PS5, where you can proceed to clear the cache. It’s important to note that clearing the cache can help improve the performance and overall functionality of your console.
Step 6: Select “Storage”
Once you’re in the settings menu, scroll down and locate the “Storage” option. Use the D-pad on your controller to navigate through the menu.
By selecting “Storage,” you’ll be able to access and manage all the storage options on your PS5.
This is an important step because clearing the cache involves deleting stored data, and you’ll need to select the appropriate storage option to proceed.
Step 7: Clear Cache
Clearing the cache on your PS5 can help improve system performance and resolve any issues related to system updates or game installations. The cache is a temporary storage location that stores data for faster access, but over time it can become cluttered and slow down your console.
Follow these steps to clear the cache on your PS5:
| Step 1 | Turn on your PS5 and go to the home screen. |
| Step 2 | Select “Settings” from the main menu. |
| Step 3 | Scroll down and select “Storage.” |
| Step 4 | Choose “Internal Storage” or “Extended Storage,” depending on where your games are installed. |
| Step 5 | Select “Games and Apps.” |
| Step 6 | Find the game or app for which you want to clear the cache, and highlight it. |
| Step 7 | Press the “Options” button on your controller. |
| Step 8 | Choose “Delete” from the menu that appears. |
| Step 9 | Confirm the deletion by selecting “OK.” |
Repeat these steps for any other games or apps that you want to clear the cache for. Keep in mind that clearing the cache will remove any temporary files or data associated with the game or app, but it will not delete your saved progress or game settings.
Clearing the cache on your PS5 can help resolve issues like slow loading times, freezes, or crashes. It is recommended to clear the cache periodically to maintain optimal system performance and ensure a smooth gaming experience.
Step 8: Confirm and Restart
Once you have cleared the cache on your PS5, it is important to confirm the action and restart your console. This will ensure that any changes made to the system are properly applied and that your console is running smoothly.
To confirm the cache clearing process, you will need to navigate to the “Confirm” option on the screen. This will usually be located at the bottom of the menu or in a separate window. Use the arrow keys on your controller to highlight the “Confirm” option, and then press the X button to select it.
Restarting Your PS5
After confirming the cache clearing process, you will need to restart your PS5. This will allow the system to reset and apply the changes you have made. To restart your console, simply press and hold the power button on the front of the PS5 for a few seconds until you hear a beep or see the power indicator light turn off. Once the console is off, wait a few moments and then press the power button again to turn it back on.
Final Check
After your PS5 has restarted, it is a good idea to perform a final check to ensure that the cache has been cleared successfully. To do this, navigate to the settings menu and select the “Storage” option. From there, you should see that the amount of used storage has decreased, indicating that the cache has been cleared. If you still see a large amount of used storage, you may need to repeat the process or contact Sony support for further assistance.
FAQ: Steps to Clear Cache on Your Ps5 Playstation
What should you do if you experience slow performance on your PlayStation console?
If you experience slow performance on your PlayStation console, you can try clearing the cache and rebuilding the database to improve system performance.
How can you clear the cache and rebuild the database on your PlayStation console?
To clear the cache and rebuild the database on your PlayStation console, you need to boot it into Safe Mode. This process helps resolve issues with slow performance and system errors.
What is the procedure for entering Safe Mode on a PlayStation console?
To enter Safe Mode on a PlayStation console, you need to turn off the console completely. Then, press and hold the power button for about seven seconds until you hear a second beep.
What happens after you hear the second beep while entering Safe Mode?
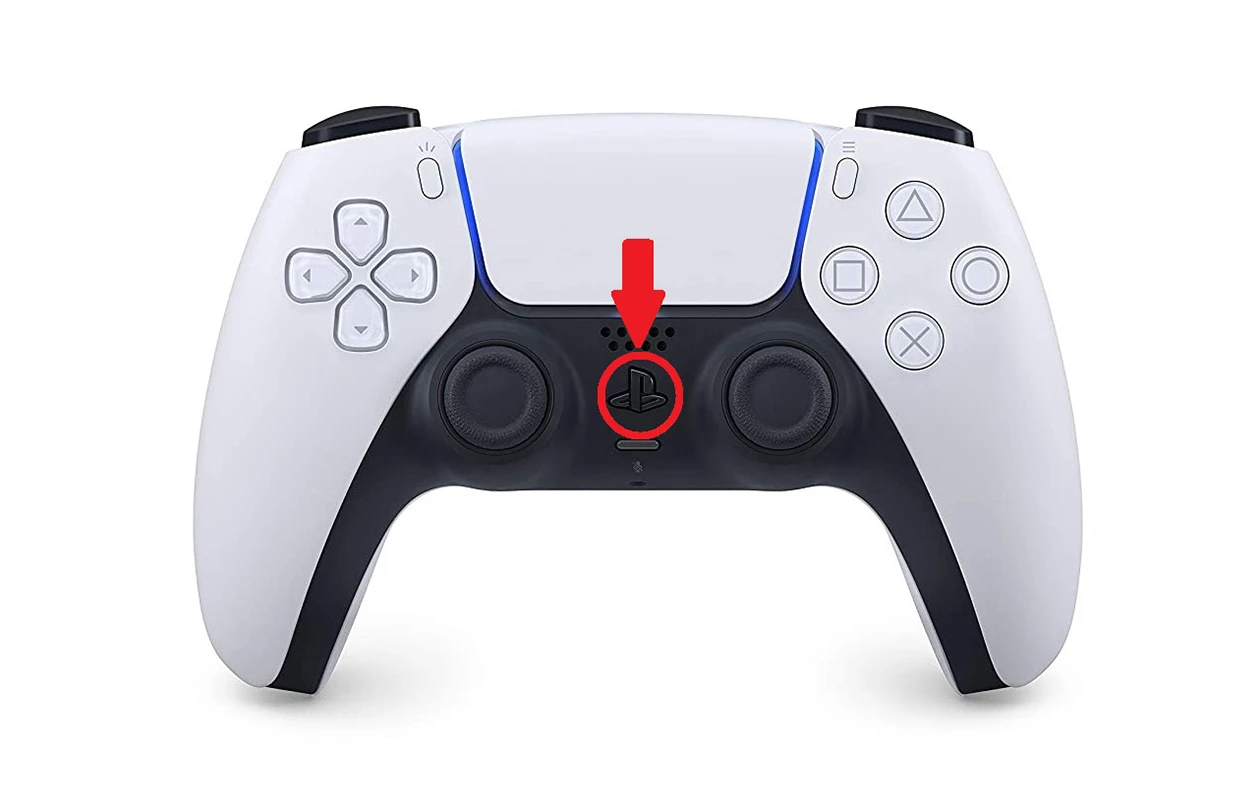
After hearing the second beep, your PlayStation console will enter Safe Mode, indicated by a special screen prompting you to connect a controller using a USB cable and press the PS button.
Why is it important to clear the cache and rebuild the database on your PlayStation console?
Clearing the cache and rebuilding the database can resolve issues caused by corrupted data or system software cache, leading to improved system performance and stability.
What should you do if your PlayStation console becomes corrupted or experiences system errors?
If your PlayStation console becomes corrupted or experiences system errors, entering Safe Mode and performing actions like clearing the cache and rebuilding the database can help resolve these issues.
What steps should you follow to clear the cache and rebuild the database on your PlayStation console?
To clear the cache and rebuild the database on your PlayStation console, you should enter Safe Mode, then select the appropriate options from the menu to perform these actions.
To enter Safe Mode on your PlayStation console, you need to hold the power button for about seven seconds until you hear a second beep, indicating that the console has entered Safe Mode.
What is the purpose of rebuilding the database on your PlayStation console?
Rebuilding the database on your PlayStation console helps organize and optimize the storage of data, resulting in improved system performance and potentially resolving issues with slow performance or system errors.
What should you do if you encounter slow performance or system errors on your PlayStation console despite clearing the cache and rebuilding the database?
If you encounter slow performance or system errors on your PlayStation console even after clearing the cache and rebuilding the database, you may need to perform additional troubleshooting steps or seek assistance from Sony support.
What is the game cache, and why is it important for console performance?
The game cache consists of temporary files and data stored on the console while playing games. Clearing the cache can help improve the console’s performance by removing unnecessary data.
How can you clear the game cache on a PlayStation console?
To clear the game cache on a PlayStation console, you can enter Safe Mode and select the option to clear the system software cache. This process deletes temporary files related to games and apps.
What steps should you follow to enter Safe Mode on a PlayStation console?
To enter Safe Mode on a PlayStation console, you need to turn off the console completely, then press and hold the power button until you hear a second beep. From there, you can navigate the Safe Mode menu.
Why is it important to clear the cache regularly on a PlayStation console?
Clearing the cache regularly helps maintain the console’s performance by preventing the accumulation of unnecessary temporary files and data that can slow down the system over time.
If you cannot navigate the Safe Mode menu on your PlayStation console, you may encounter minor problems or issues with the console’s performance that require further troubleshooting.
What are the potential benefits of clearing the cache on a PlayStation console?
Clearing the cache on a PlayStation console can resolve performance issues, such as apps or games not loading properly, by deleting temporary files and data that may have become corrupted.
How does clearing the cache contribute to keeping a PS5 in tip-top condition?
Clearing the cache regularly helps maintain the PS5’s performance and ensures that the console runs smoothly for as long as possible by preventing the accumulation of unnecessary temporary files.
What is the process of clearing the cache and rebuilding the database on a PlayStation console?
The process of clearing the cache and rebuilding the database on a PlayStation console involves entering Safe Mode and selecting the option to “Clear Cache and Rebuild Database.” This process can help resolve various performance issues.
Why might you want to clear the cache on your PS5 controller?
Clearing the cache on a PS5 controller can help resolve issues with the controller’s performance or connectivity by deleting temporary data and resetting the controller’s settings.
What should you do if you encounter apps or games not loading properly on your PlayStation console?
If you encounter apps or games not loading properly on your PlayStation console, you can try clearing the cache, relaunching the game or app, or performing additional troubleshooting steps to resolve the issue.


